Screenshots and screen recordings for Windows, Mac and Linux

Capture it. Mark it up.
Share it.

Press one key to grab any part of your screen or record a video of it. ClipShot opens the result in a simple editor where you add arrows, text, numbered steps and highlights, or blur out private details. ClipShot is free software.

  • Windows 11, macOS and Linux
  • No admin rights needed
  • Saved and copied automatically
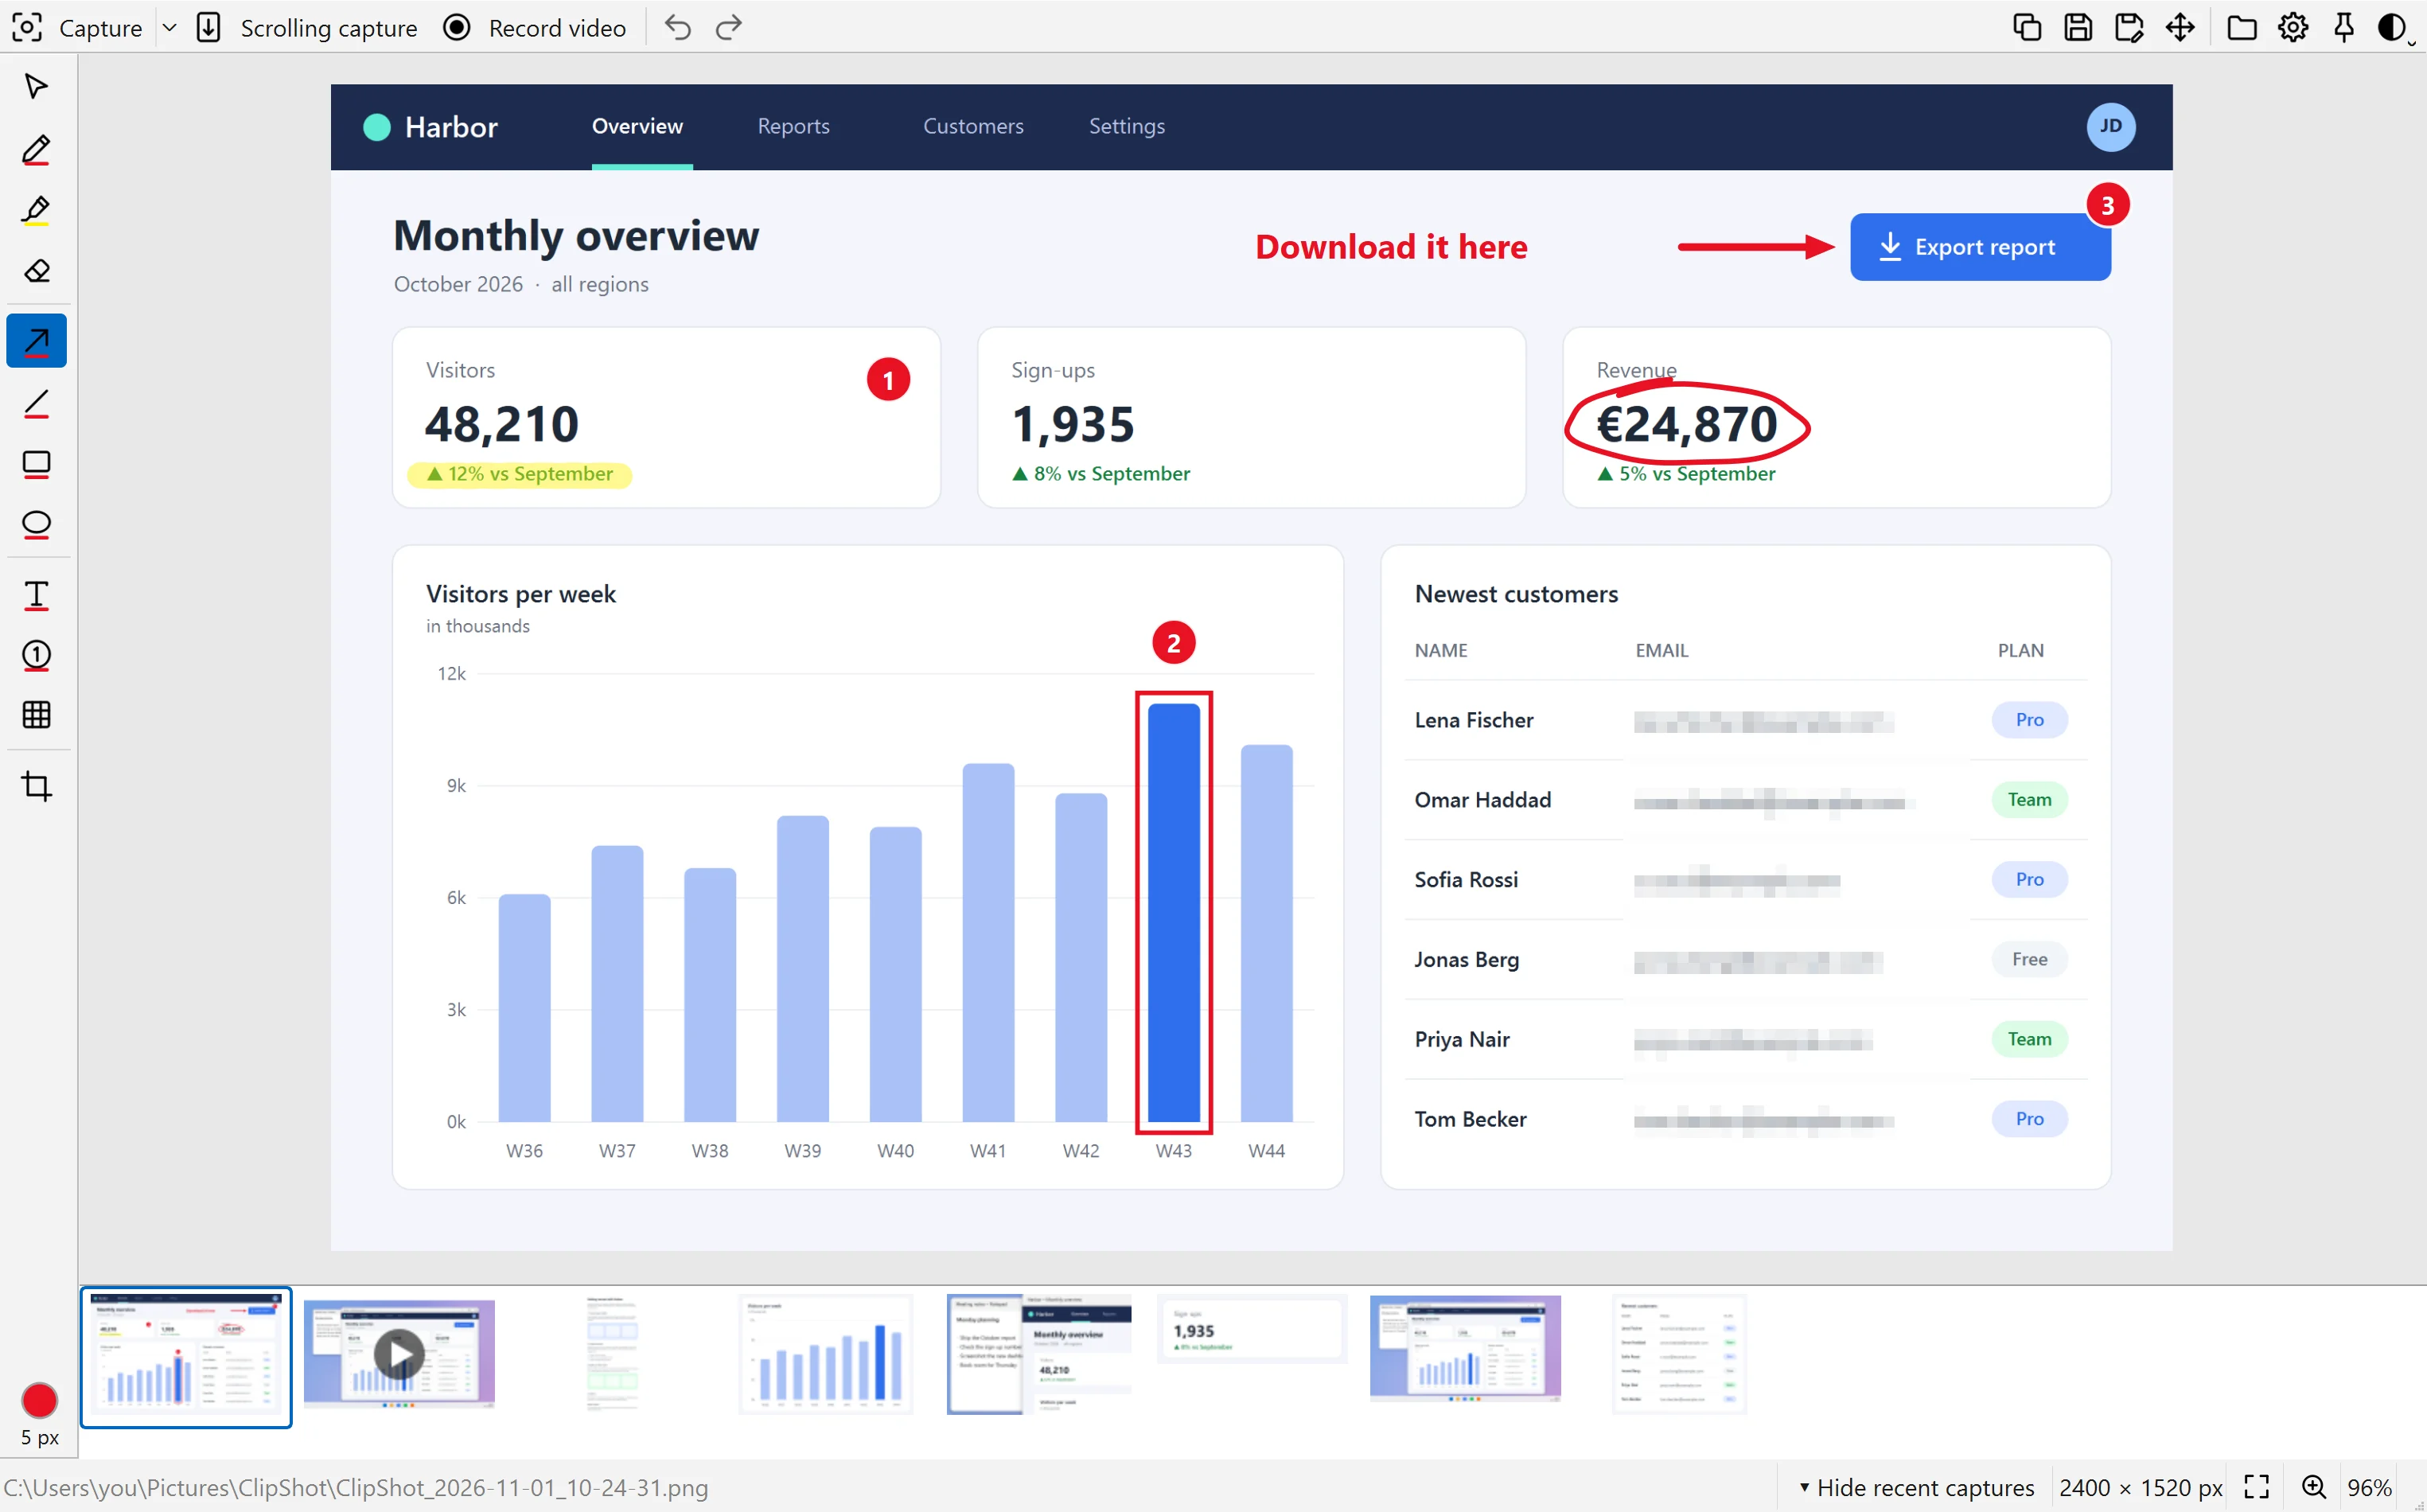
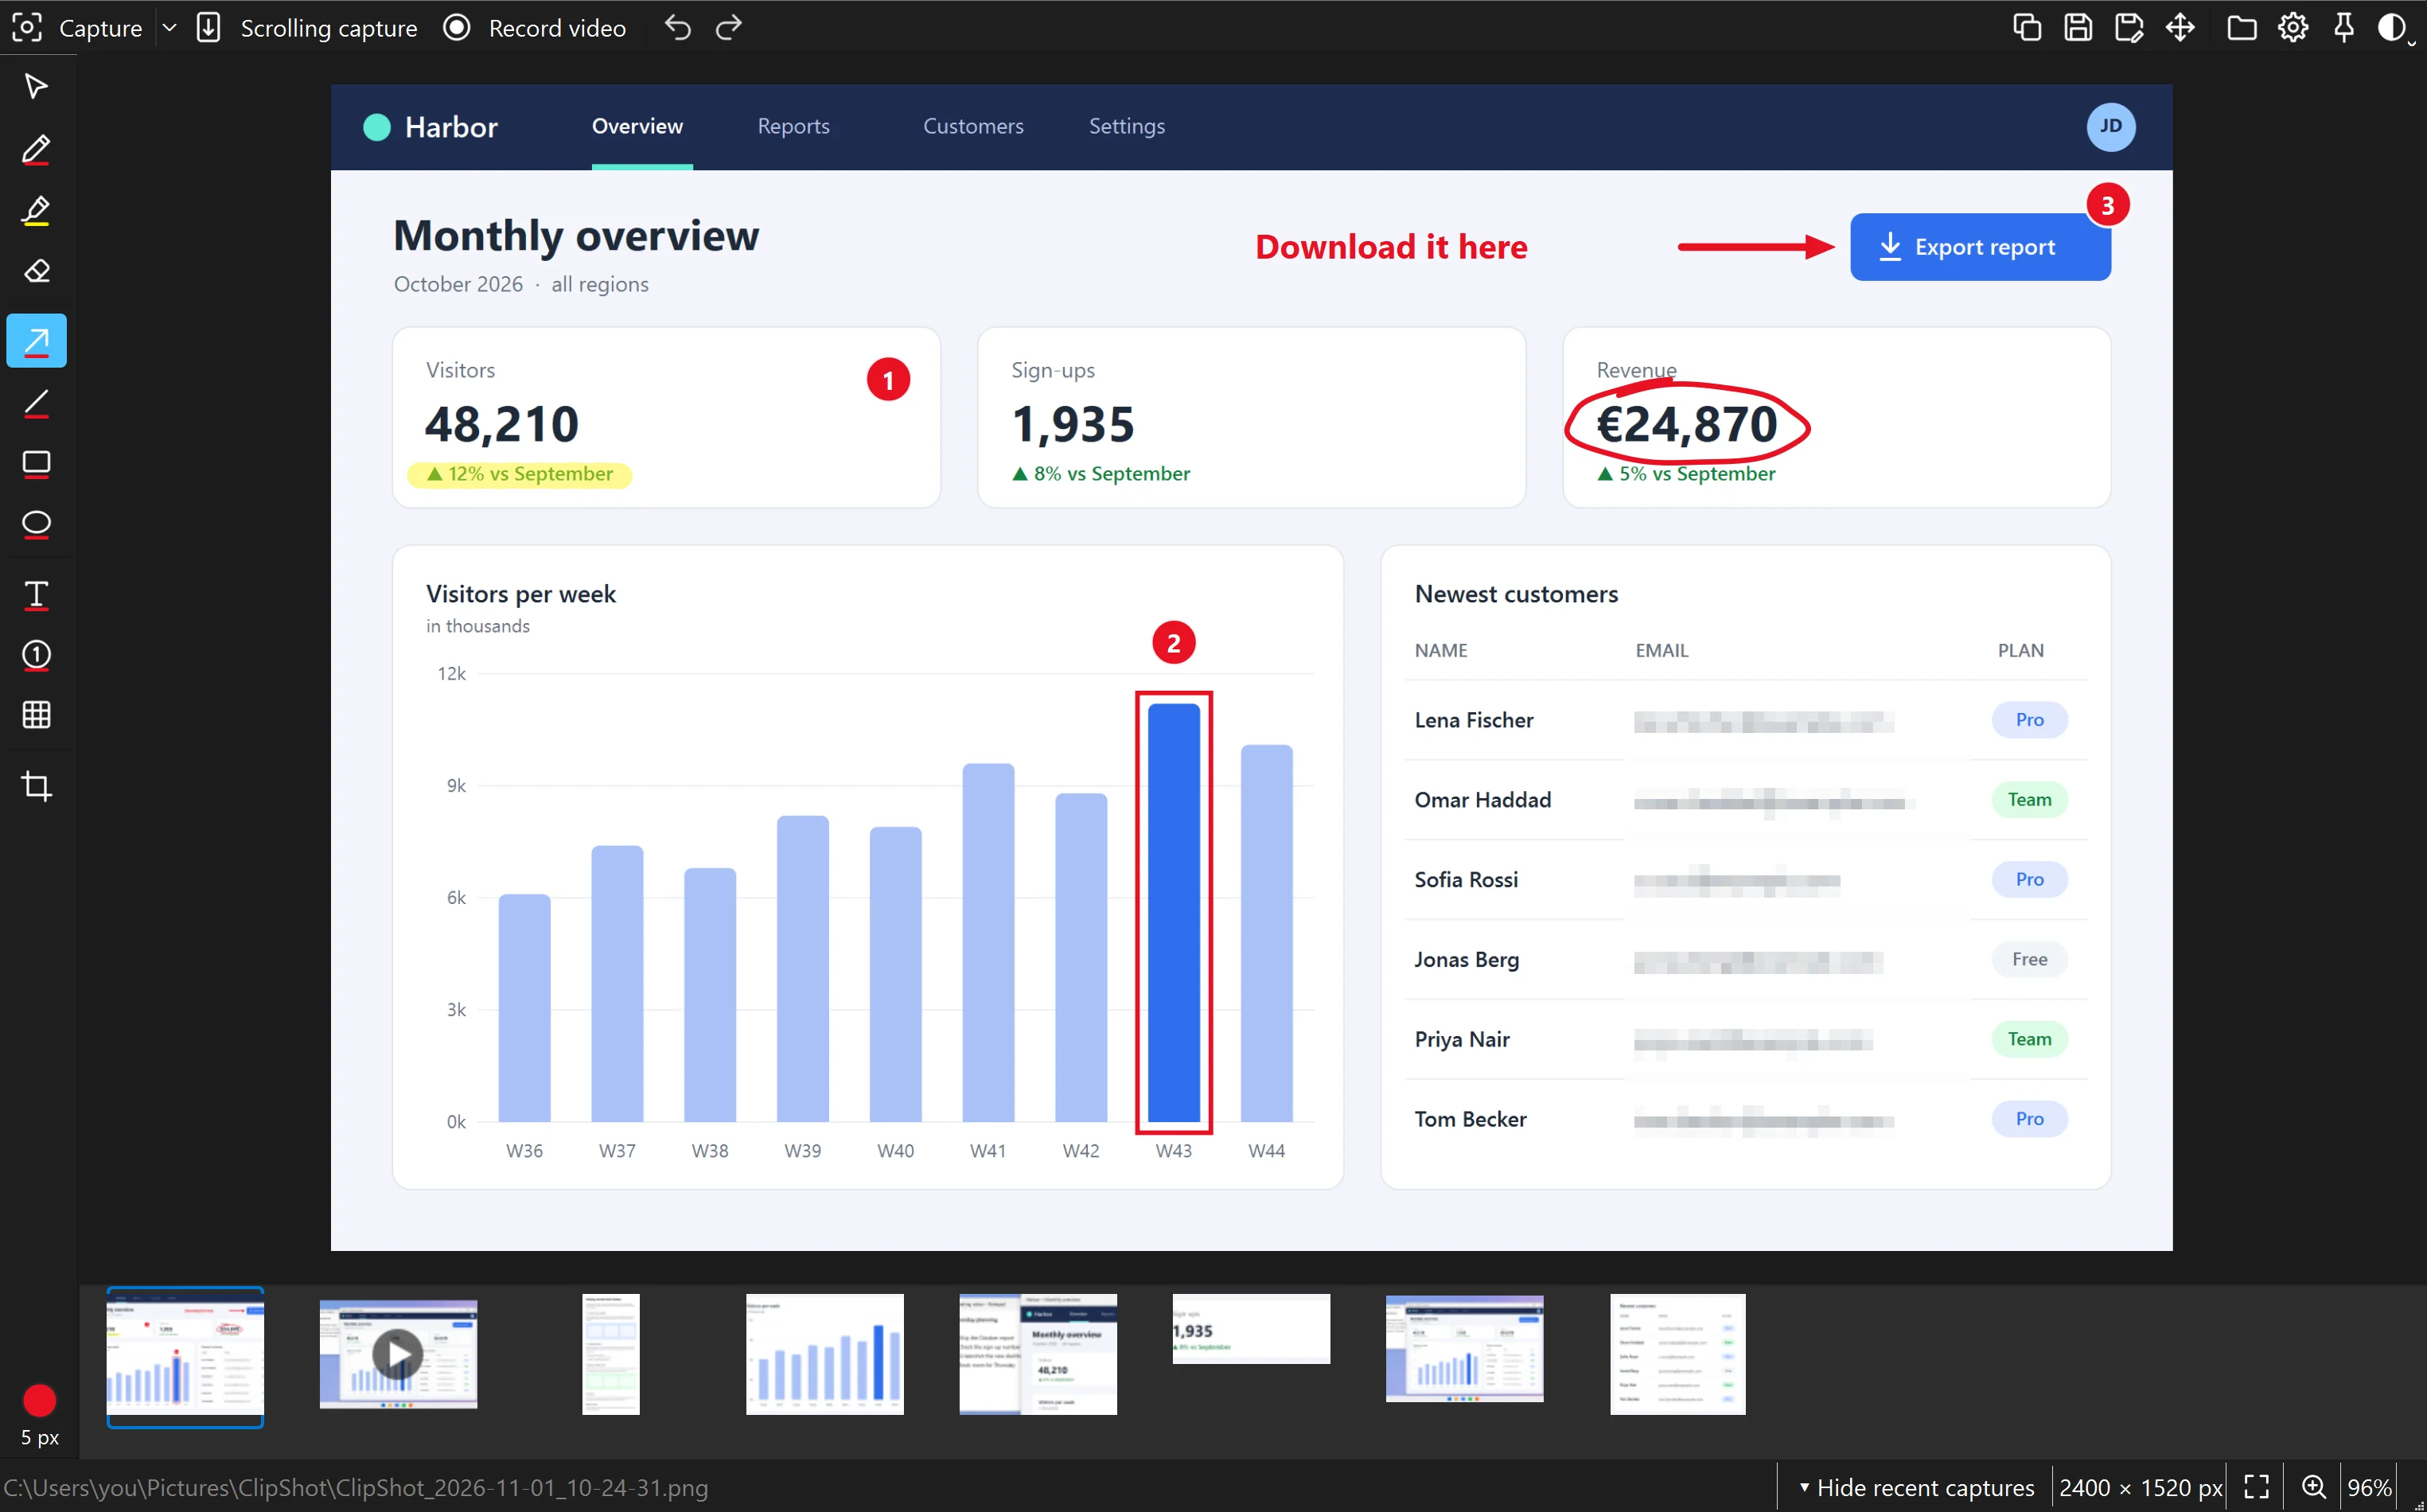
The ClipShot editor showing a screenshot of a dashboard, marked up with numbered steps, an arrow, a text label, a rectangle, a circled number, a highlight and a blurred column of email addresses. A row of recent captures runs along the bottom. The ClipShot editor in dark mode with the same marked-up dashboard screenshot.
The basics

Three steps, a few seconds

No menus to dig through. Once ClipShot is running, everything starts with a key press.

  1. Press Print

    The screen freezes so nothing changes while you choose. (On Linux you pick your own shortcut; see Get started.)

  2. Drag or click

    Drag a box around what you need, or click a window to take all of it. Press Esc if you change your mind.

  3. Mark it up and share

    The picture is already saved and copied. Paste it into a chat or email right away, or add arrows and notes first.

Capture exactly what you mean

When you press Print, the screen freezes and dims. Whatever you point at lights up with an orange frame, and its size shows in the corner.

  • Drag a box to capture any area.
  • Click to capture the window under the mouse.
  • Turn the mouse wheel to step from the window down to a single part of it, such as a panel, a toolbar or a button, and back up.
  • The magnifier next to the cursor shows the pixels up close, with their position and colour code.
  • Enter takes the whole screen. Esc or a right-click cancels.
The frozen, dimmed screen during a capture. A chart panel inside a window is outlined in orange with its size, 950 by 644, shown above it. Dashed crosshair lines meet at the cursor, where a magnifier shows enlarged pixels, the position and the colour code. A hint bar at the top explains drag, click, mouse wheel and Esc.

The same area again, with one key

Documenting several steps, or showing a before and an after? Ctrl Shift Print captures exactly the area of your last screenshot, without selecting it again.

  • Also in the menu of the small arrow beside Capture, and in the tray icon's menu.
  • The same menu sets a delay of 1 to 5 seconds, so you can open a menu or hover over something before the picture is taken.
  • Before your first screenshot there is nothing to repeat, so you simply choose an area as usual.
The menu of the arrow beside the Capture button: Capture previous area with the shortcut Ctrl+Shift+Print, then No delay (ticked) and 1 to 5 second delays.

Long pages in one picture

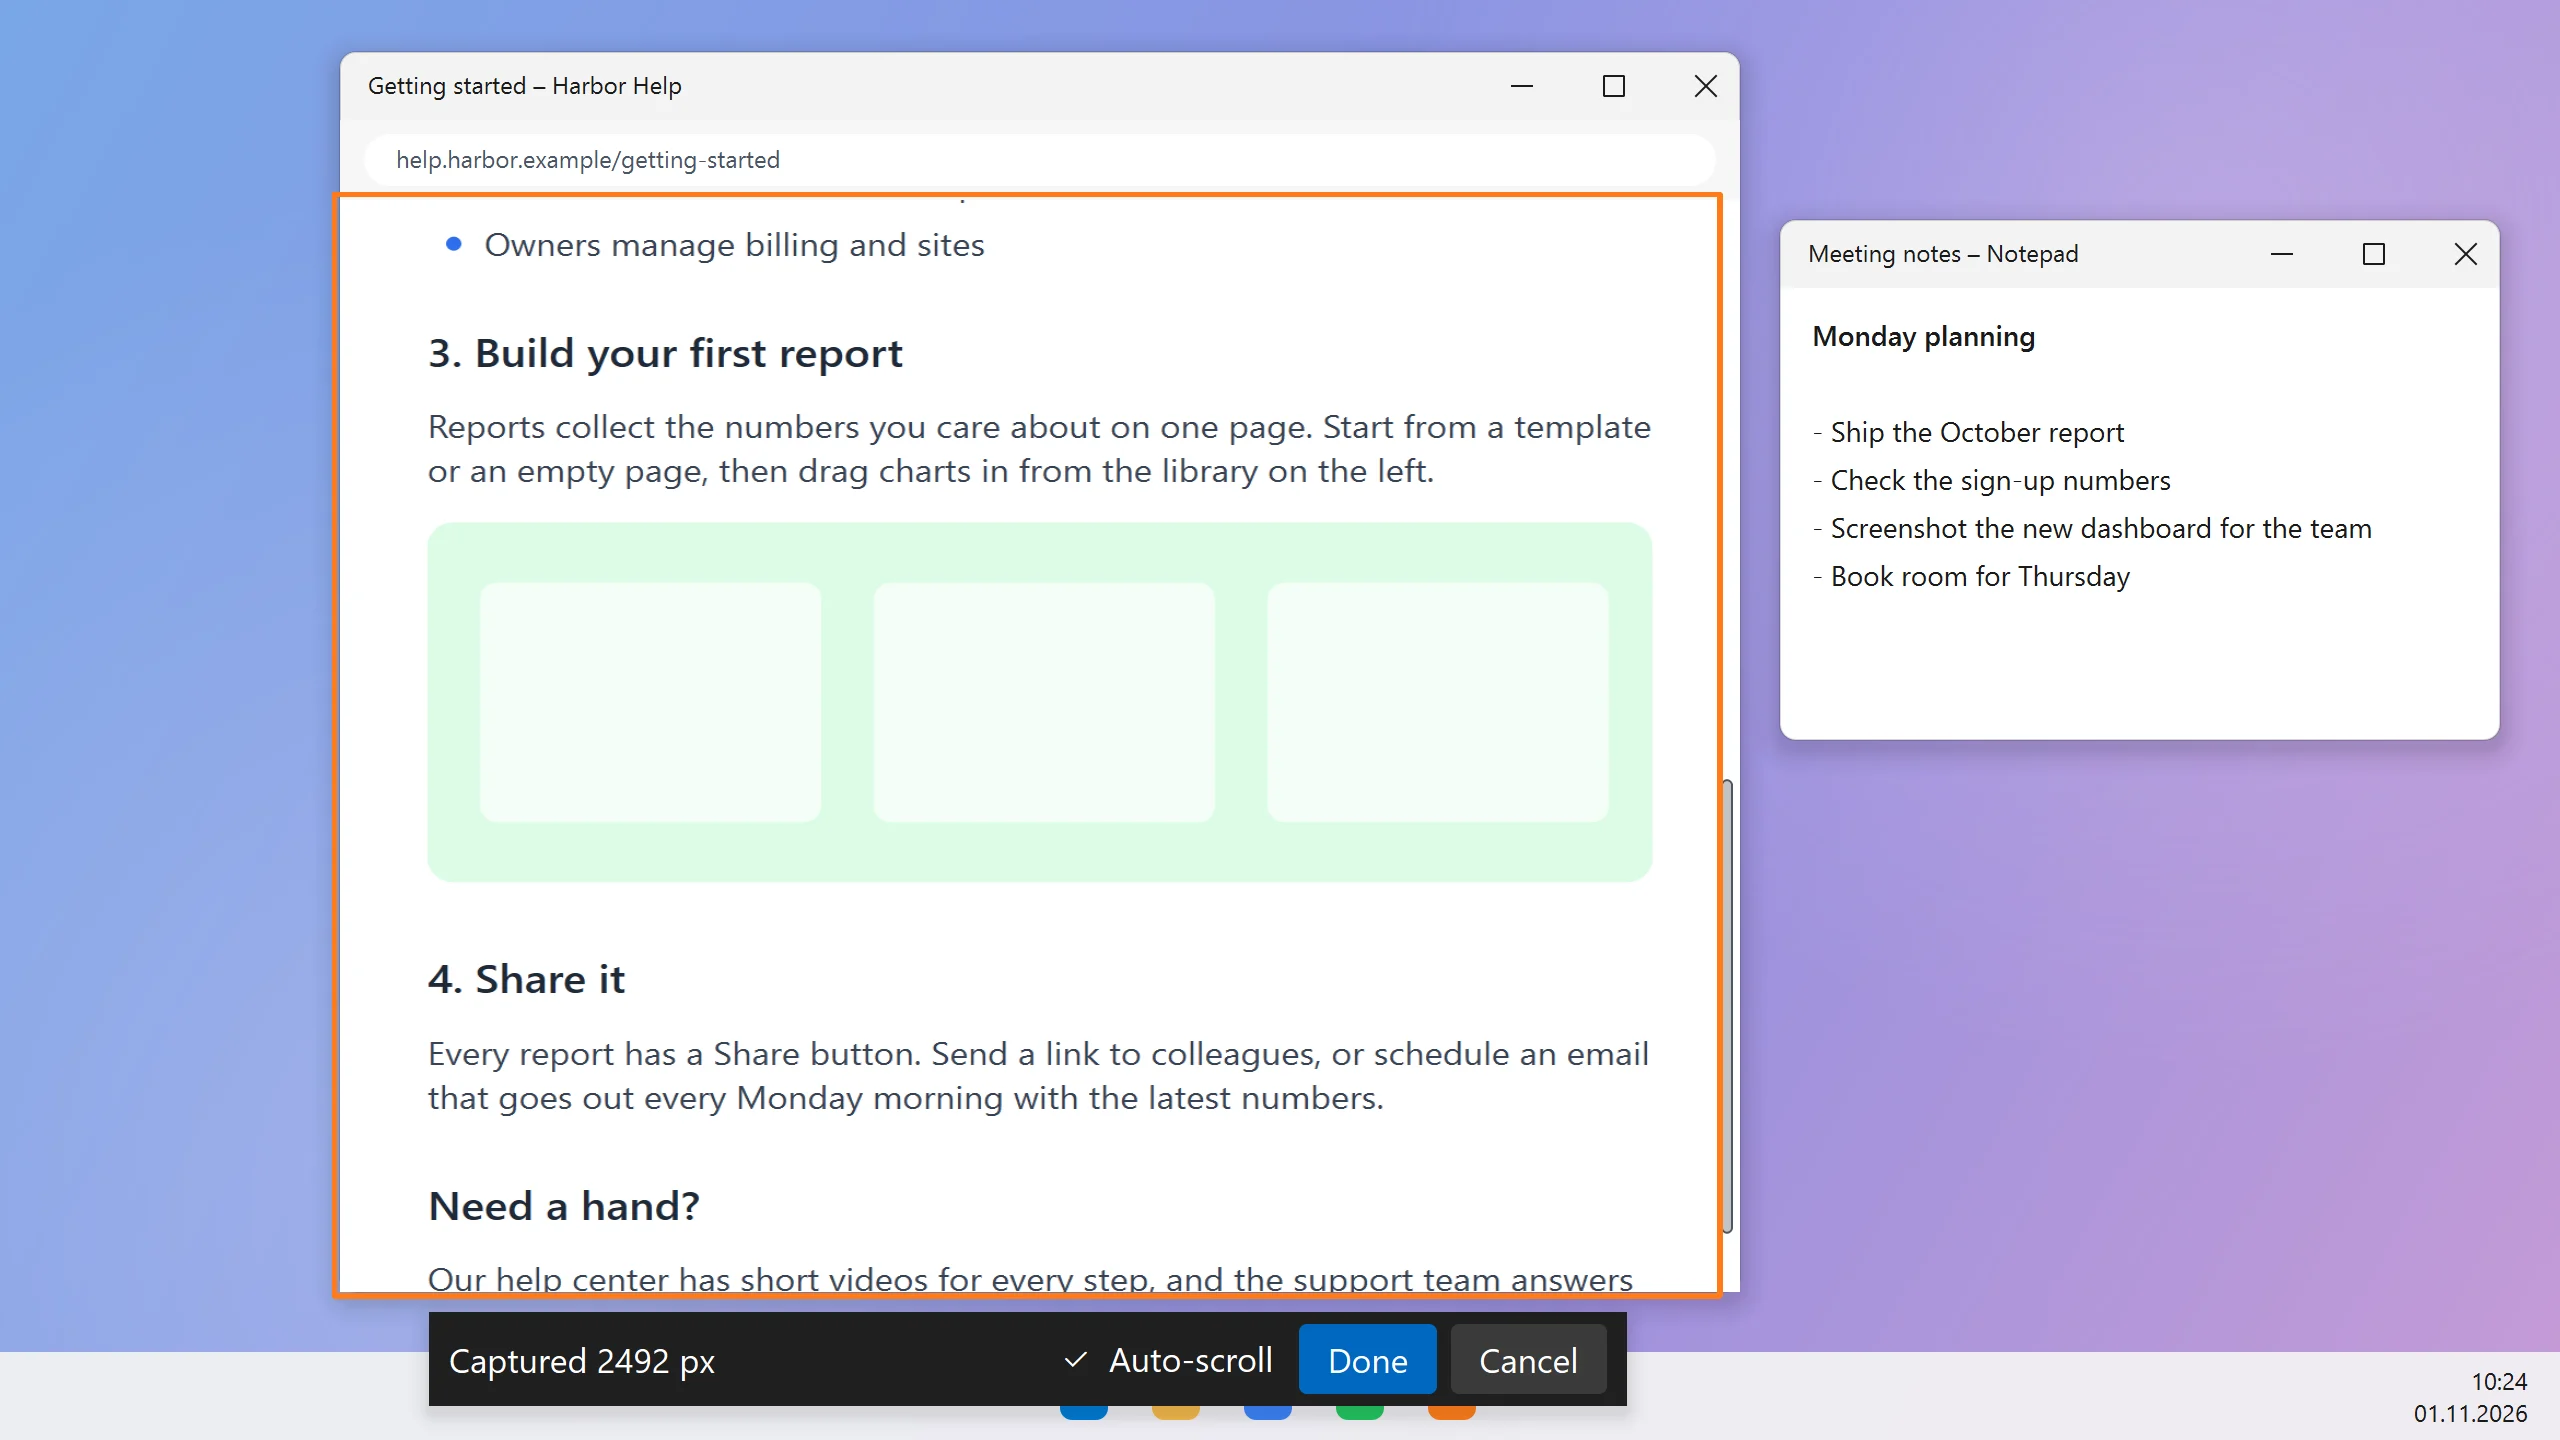
A web page, a chat history or a long document rarely fits on the screen. Press Ctrl Print, then drag over the part that scrolls (or click the window). ClipShot scrolls it for you and joins everything into one tall image.

  • It stops by itself at the bottom, or click Done whenever you have enough.
  • Turn off Auto-scroll on the bar to scroll yourself, at your own pace.

The finished capture. Scroll inside the box.

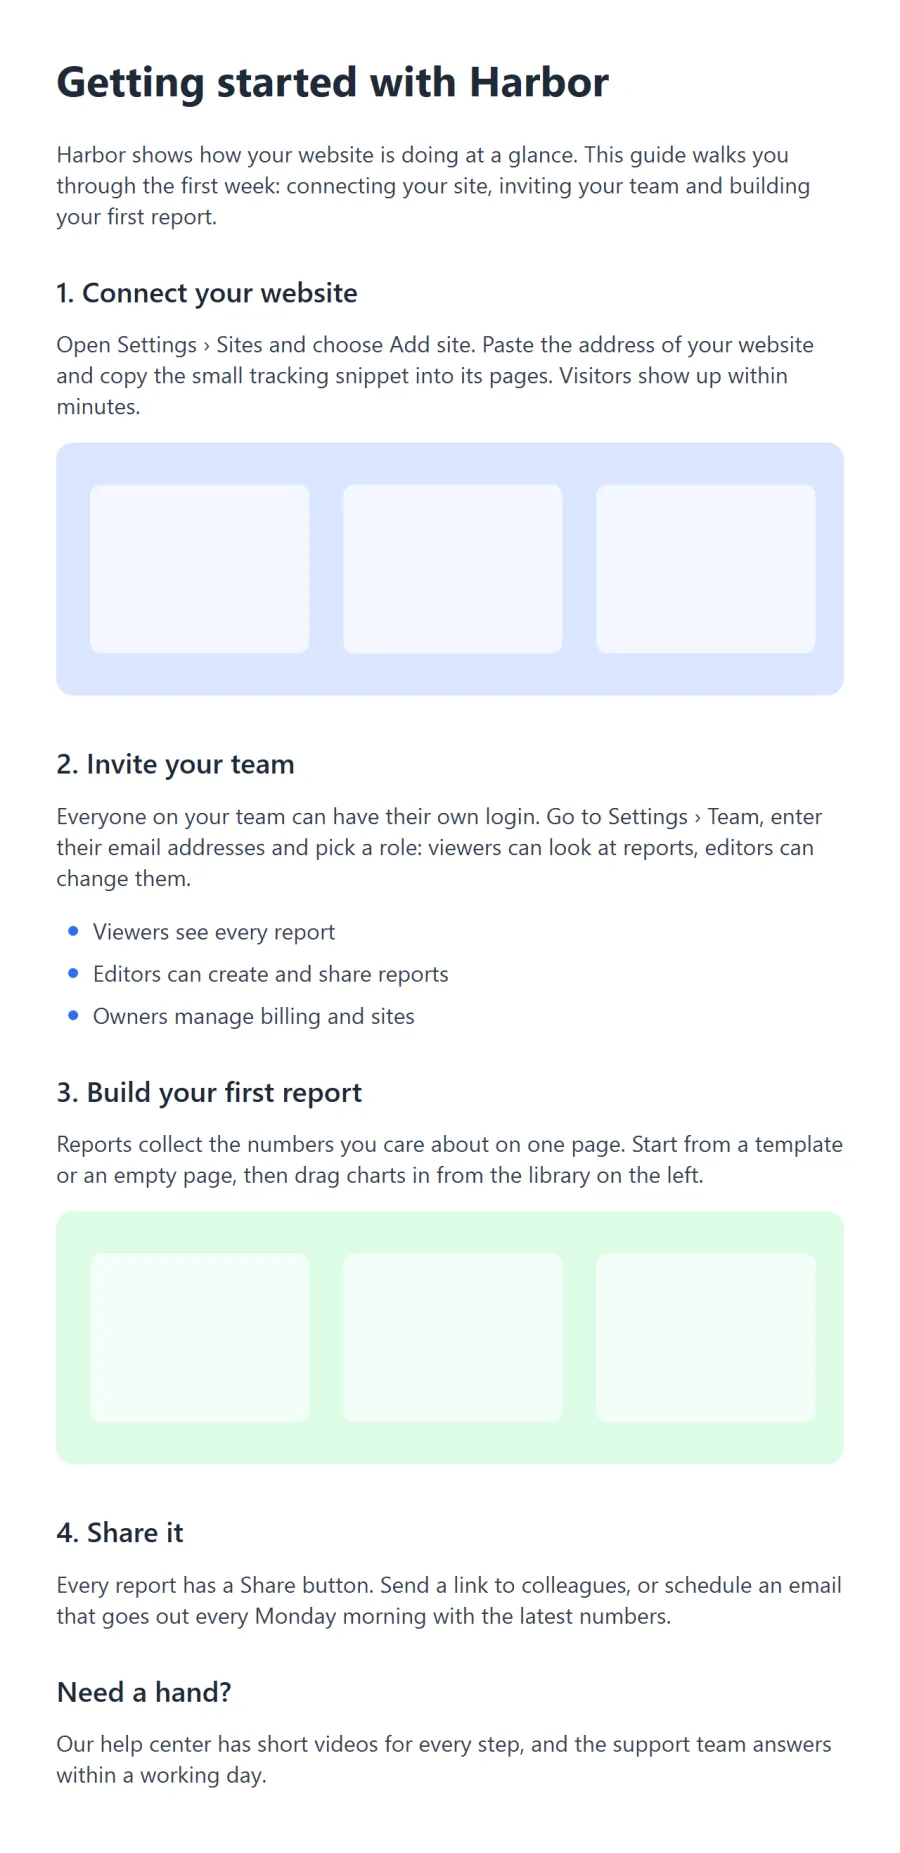
A help article captured from top to bottom as one tall picture.
A scrolling capture in progress: the page area of a browser window has an orange frame, and a dark bar below it reads Captured 2492 px, with an Auto-scroll checkbox and Done and Cancel buttons.

Record your screen, with sound if you like

Press Shift Print, then drag an area, click a window, or press Enter for the whole screen. A small bar appears below it.

  • Tick Microphone to record your voice, then click Record.
  • ClipShot notes which mouse buttons and keys you press, such as Alt + Left Mouse, so the editor can show them. Typed text counts too, so don't type passwords while recording.
  • Click Stop, or press Shift Print again, to finish. Discard throws the recording away.
  • The frame and the bar never show up in the video.
  • The video is saved as an MP4 file and opens in the editor, ready to trim.
The recording bar while recording: a timer at 00:07, Mic on, Mouse & keys on, and Stop and Discard buttons.
Getting ready to record: a dashed orange frame marks the area, and a dark bar below it shows the size 1840 by 1040, a ticked Microphone checkbox and Record and Cancel buttons.

Trim it and save it as MP4 or GIF

A recording opens in a player instead of the drawing tools. Cut off the fumbling at the start and the end, then export.

  • Drag the bars at the ends of the timeline to trim, or use Start here and End here (keys [ and ]).
  • Export MP4… for a video file, Export GIF… for an animation that plays anywhere, even in places that don't take videos.
  • For GIFs, pick the frame rate and width. GIFs grow large quickly: 800 px wide or less is a good start.
  • Tick Show mouse & keys to show the buttons and keys you pressed on the video and include them in exports. Untick it to leave them out.
  • Your original recording stays untouched, so you can export again with other settings.
  • GIFs in your captures folder open in the same player, so you can step through and trim them too. You can't draw on them.
The editor with a recording open: the video picture, a play button and a timeline whose highlighted middle part is the trimmed section, Start here, End here and Reset trim buttons, the note Trimmed to 00:01.8 to 00:11.6, GIF frame rate and width menus, and Export MP4 and Export GIF buttons.

Mark it up

The drawing tools sit down the left side. Pick one and draw on the capture. Click the tool again (or the colour dot at the bottom) for its colours, thickness and more.

  • Pen and highlighter with smoothing for steady lines, and pressure if you use a pen or tablet.
  • Arrows, lines, rectangles and ellipses; hold Shift for straight angles, squares and circles.
  • Text and numbered steps that count up by themselves.
  • Pixelate to hide names, emails or passwords for good.
  • Crop, or drag outward to make the canvas bigger.
  • An outline colour keeps marks readable on any background.
  • Everything stays editable: open a capture next week and move, recolour or delete any arrow or label.

Every tool is listed in the shortcuts.

The pen's options next to the tool bar: twelve colour swatches, More colours, a Thickness slider at 4, a Smoothing slider at 3, and Outline colours.

Every capture, one click away

The strip along the bottom of the editor shows your 20 newest screenshots, recordings and GIFs, newest first by when you made them, so editing one doesn't move it. Click one to open it; your changes to the current one are saved first.

  • Right-click a capture to copy, rename, show it in its folder or move it to the recycle bin.
  • Click in the strip, then press Del to move the selected captures to the recycle bin, or Ctrl ← and Ctrl → to flip through them.
  • Drag one onto the open capture to combine pictures, or drag it straight into an email or chat.
  • Drag within the strip to put captures in your own order. Right-click and choose Sort by date again to undo it.
  • Older captures stay in the folder; the folder button in the top bar opens it.
  • Captures are saved to Pictures\ClipShot unless you choose another folder in Settings.
The strip of recent captures at the bottom of the editor: thumbnails of screenshots and a video with a play symbol, the open one outlined in blue, and the file path below.

Light or dark

The half-filled circle at the right end of the top bar switches between Light, Dark and Same as Windows. All icons and the canvas follow along. The pin beside it keeps the editor above other windows.

Drag the handle across the picture to compare.

The editor in light mode.
The editor in dark mode.
LightDark
Get started

Set up in a few minutes

You don't need admin rights on Windows or Linux. You need a copy of ClipShot, and an internet connection the first time.

Windows 11

Run it straight from the folder, or build a program file.

  1. Get the ClipShot folder

    Copy it to your computer, for example into Documents.

  2. Start it

    Easiest: double-click run.bat. The first start sets everything up (about 140 MB, a few minutes); later starts are quick. This needs Python 3.10 or newer; if it's missing, install it from python.org first.

    As a program file: double-click build.bat. You get dist\ClipShot\ClipShot.exe, which starts without Python. For a single file you can copy to another PC, run build.bat onefile instead (type it in a Command Prompt opened in the folder); you get dist\ClipShot.exe.

  3. Let ClipShot have the Print key

    Windows 11 gives it to its own screenshot tool. Open Settings › Accessibility › Keyboard and turn off Use the Print screen key to open screen capture. Or choose other keys in ClipShot's settings.

  4. Find it in the tray

    ClipShot starts minimised, among the small icons next to the clock, and a short notice says so. It keeps running there even after you close the editor, so the keys always work. Click the icon to capture; double-click it, or start ClipShot again, to open the editor.

Linux

Made for Rocky Linux 9 with KDE Plasma.

  1. Get the ClipShot folder

    Copy or clone it anywhere in your home folder.

  2. Run the setup once

    Open a terminal in the folder and type:

    bash install-linux.sh

    It needs no admin rights and never uses sudo. It downloads ClipShot's parts (about 140 MB) into the folder and adds ClipShot to the application menu. If system packages are missing, it lists them with the commands to give to someone with admin rights; ClipShot works without them. Run it again after moving the folder or updating ClipShot.

  3. Give it keyboard shortcuts

    Linux has no way for apps to claim keys, so you set them in KDE: open System Settings › Keyboard › Shortcuts › Add New › Application (Plasma 5: System Settings › Shortcuts › Shortcuts › Add Application…), pick ClipShot and give its actions keys: Capture, Capture previous area, Scrolling capture and Record video. Print belongs to Spectacle at first, so free it there.

  4. Choose “Plasma (X11)” when you log in

    Everything works there, including recording with sound. In a Wayland session, screenshots work, but recording and scrolling capture don't. Selecting a window by clicking isn't available on Linux; drag around it instead.

macOS

macOS 14.4 or newer. The disk image is made for Apple Silicon.

  1. Install it

    Open ClipShot-macOS-arm64.dmg and drag ClipShot to Applications. To build it yourself on a Mac, run bash build-mac.sh.

  2. Open it the first time

    ClipShot isn't signed with an Apple developer ID, so macOS refuses it once. Open System Settings › Privacy & Security and choose Open Anyway.

  3. Let it see the screen

    Your first capture makes macOS ask. Turn ClipShot on under Privacy & Security › Screen & System Audio Recording, then quit and reopen it.

  4. Find it in the menu bar

    Press ⌘⇧1 to capture, or click the icon for its menu. Clicking ClipShot in the Dock opens the editor.

Videos need ffmpeg, and ClipShot fetches it for you. The first time you record or export a video, it offers to download it: about 115 MB on Windows, 150 MB on Linux, from the builds linked on ffmpeg.org; about 30 MB on macOS, from ffmpeg.martin-riedl.de. It checks the download and keeps it in its own folder, so no admin rights are needed.

Already have ffmpeg (for example from winget install Gyan.FFmpeg or brew install ffmpeg)? Then that one is used.

Starting actions from a launcher (Linux). The shortcuts run ClipShot with an option, which works from any launcher or script too:

./run.sh --capture
./run.sh --previous
./run.sh --scroll
./run.sh --video

A running ClipShot picks the action up. Running --video again stops a recording.

How-to

Step-by-step guides

Short instructions for the things people do most. Click a question to open it.

Screenshots

Take a screenshot
  1. Press Print, click Capture in the editor, or click the ClipShot icon in the tray.
  2. Drag a box around what you need, or click a window. Turn the mouse wheel to pick a smaller part of the window first.
  3. Let go. The screenshot is saved, copied, and opens in the editor.

Paste it anywhere with Ctrl V, or mark it up first.

Capture the same area again

Press Ctrl Shift Print. ClipShot captures the area of your last screenshot straight away. You can also choose Capture previous area from the arrow beside Capture or from the tray icon's menu.

Capture an open menu or a tooltip
  1. Click the small arrow beside Capture and choose a delay of 1 to 5 seconds. It stays set until you change it.
  2. Press Print. A countdown appears.
  3. Open the menu or hover over the item while it counts down.

Press Print again to capture right away, or click the countdown to cancel.

Capture a whole web page or long document
  1. Scroll to the top of the page.
  2. Press Ctrl Print and drag over the part that scrolls, or click the window.
  3. ClipShot scrolls down by itself. It stops at the end, or click Done.

If the page moves strangely (some pages animate while scrolling), turn off Auto-scroll and scroll slowly with the mouse wheel yourself.

Videos

Record a video of your screen
  1. Press Shift Print or click Record video.
  2. Drag an area, click a window, or press Enter for the whole screen.
  3. Tick Microphone to record your voice, then click Record.
  4. When you're done, click Stop or press Shift Print again.

The video opens in the editor. The first time, ClipShot may ask to download ffmpeg, which it needs for videos.

Trim a recording
  1. Open the recording (it opens by itself after you stop).
  2. Drag the bar at the left end of the timeline to where the video should start, and the bar at the right end to where it should stop.
  3. To be exact to the frame: pause, step with ← and →, then press [ or ] (or click Start here / End here).

Trimming only affects what you export. Reset trim starts over.

Save a video as MP4 or as a GIF
  1. Trim the recording if you like.
  2. For a GIF, pick the frame rate and width next to the buttons. Fewer frames and a smaller width make a smaller file.
  3. Click Export MP4… or Export GIF… and choose where to save it.

To send the recording itself, press Ctrl C in the editor and paste it into a chat, an email or a folder.

Editing

Add arrows, text and numbered steps
  1. Pick a tool on the left: Arrow (A), Text (T) or Step (N).
  2. Drag for an arrow; click and type for text; click once per step for numbered circles.
  3. To change colour or size, click the active tool again. , and . make it thinner or thicker.
  4. To move or change something later, use Select (V). Double-click text to edit it.
Hide private information
  1. Choose Pixelate (P).
  2. Drag a box over the names, email addresses or numbers to hide.

The saved picture is flattened, so nothing under the pixelated area can be recovered from it. It's safe to share.

Crop, or make room around a capture
  1. Choose Crop (C).
  2. Drag the edges inward to cut away the rest, or outward to add empty (transparent) space around it, for notes in the margin.
  3. Press Enter or click Apply crop. Esc cancels.
Combine several screenshots in one picture
  1. Open the first screenshot.
  2. Drag another one from the strip at the bottom onto it, or drag an image file from Explorer, or paste one with Ctrl V. Right-click in the strip offers Insert into current image too.
  3. Move and resize it. The corners keep the proportions; hold Shift to stretch.

If something reaches past the edge, the canvas grows to fit it.

Change a screenshot you took earlier

Click it in the strip at the bottom of the editor. Arrows, text, shapes and blurs come back as separate objects you can move, restyle or delete. Changes are saved automatically when you switch captures or close the editor.

Sharing and organising

Paste a capture into a chat, email or document

Every new screenshot is already on the clipboard, so just press Ctrl V there. After marking it up, press Ctrl C in the editor to copy the picture with all your marks.

Drag a capture into another app

Grab the four-way arrow button in the top bar and drop it into a chat, an email or a folder. You can also drag thumbnails from the strip at the bottom.

Save a copy somewhere else

Press Ctrl Shift S (Save as…). Every capture is saved to your captures folder anyway, so this is only for an extra copy.

Rename or delete captures

Right-click a thumbnail in the strip at the bottom: Rename…, Show in folder, Copy file path or Move to recycle bin. Select several with Ctrl or Shift to delete them together.

Reference

Keyboard shortcuts

The capture keys work everywhere while ClipShot runs. The rest work in the editor.

Capturing Windows defaults

KeysWhat happens
PrintCapture an area, a window or a part of it
CtrlShiftPrintCapture the same area as last time
CtrlPrintScrolling capture
ShiftPrintRecord a video; press again to stop

On a Mac the defaults are ⌘⇧1, 2, 7 and 8, in this order, and elsewhere on this page Ctrl means ⌘ and Alt means ⌥.

Change them in Settings. On Linux you assign keys in KDE instead (see Get started).

While choosing an area

ActionWhat happens
DragSelect an area
ClickCapture the highlighted window or part (Windows)
Mouse wheelHighlight a smaller or larger part of the window
EnterTake the whole screen
Esc / right-clickCancel

Drawing tools

ToolKeyGood to know
SelectVMove and resize with the handles. Del deletes, the arrow keys nudge.
Ballpoint penBSmooth freehand ink. With a pen or tablet, pressing harder draws thicker, and the pen's eraser end erases.
HighlighterHSee-through colour, always under the ink.
EraserERemoves whole strokes and shapes.
Arrow / LineA / LHold Shift for steps of 45°.
Rectangle / EllipseR / OHold Shift for a square or a circle.
TextTClick and type. Double-click existing text to edit it.
StepNNumbered circles that count up by themselves.
PixelatePHides sensitive areas for good.
CropCDrag edges in to crop, out to enlarge the canvas. Enter applies, Esc cancels.

In the editor

KeysWhat happens
CtrlZUndo
CtrlYRedo
CtrlCCopy the picture with all marks (or the video file)
CtrlVPaste an image onto the capture
CtrlSSave
CtrlShiftSSave as…
CtrlASelect all marks
, .Current tool thinner / thicker
Alt + clickPick a colour from the capture
Ctrl + wheelZoom
CtrlSpace + dragZoom with the pen or mouse: up to zoom in, down to zoom out. On a Mac, hold ⌥Space, as ⌘Space opens Spotlight.
Ctrl0 / Ctrl1Fit to window / actual size
Space + dragMove around (or drag with the middle mouse button)
CtrlWClose the editor (ClipShot keeps running)

Playing a recording

KeysWhat happens
SpacePlay / pause
← →One frame back / forward
Shift← Shift→One second back / forward
[ ]Start / end the export at this frame
CtrlCCopy the video file

On the recording bar

Enter / SpaceRecord / stop
EscCancel, or discard the recording

On the recent captures strip

KeysWhat happens
DelMove the selected captures to the recycle bin
Ctrl← Ctrl→Open the newer or older capture
Reference

Settings

Open them with the gear in the editor's top bar, or from the tray icon's menu.

The ClipShot settings window with theme, save folder, file name pattern, hotkeys, screenshot delay, checkboxes for clipboard, editor, automatic saving, auto-scroll and starting at sign-in, pen tablet, ffmpeg and microphone.
Theme
Light, dark, or the same as Windows.
Save captures to
The folder for new screenshots and recordings. It starts as Pictures\ClipShot.
File name pattern
How new files are named. The codes stand for the date and time: %Y year, %m month, %d day, %H hour, %M minute, %S second. The default gives names like ClipShot_2026-11-01_10-24-31.png.
HotkeysWindows
The keys for capture, previous area, scrolling capture and recording. Click a box and press the new keys; the × clears it. On Linux, set them in KDE.
Screenshot delay
Wait 1 to 5 seconds before a screenshot, to open a menu first. Also in the arrow menu beside Capture.
Copy every capture to the clipboard
So you can paste right away. On by default.
Open the editor after capturing
Turn it off to only save; a small notice confirms each capture.
Save edits automatically
Writes your marks into the file when you switch captures or close the editor. Turn it off to be asked instead.
Scroll automatically during scrolling capture
Turn it off if you'd rather always scroll yourself.
Start minimised to the tray
On by default: starting ClipShot opens no window, and a short notice says it's ready. Turn it off to open the editor every time you start it.
Start ClipShot when I sign in
Starts it quietly in the tray, so the keys work from the start.
Pen tabletWindows
Wintab reads pen pressure straight from the tablet's driver, with Windows Ink on or off; the line below shows whether a Wintab driver was found. Without one, pressure comes through Windows Ink. Choose Windows Ink if you only want that.
ffmpeg
Found automatically. Shows whether video recording is ready, with a button to download ffmpeg if it's missing. You can also point to a copy of your own.
Microphone
Which microphone to record from. Whether sound is recorded at all is the Microphone box on the recording bar.
Help

Tips and questions

When I press Print, the Windows screenshot tool opens instead

Windows 11 keeps the key for itself. Open Settings › Accessibility › Keyboard, turn off Use the Print screen key to open screen capture, then restart ClipShot. Or pick different keys in ClipShot's settings. If any key is taken by another program, ClipShot shows a notice saying which one.

On a Mac, my capture shows only the wallpaper, or ClipShot keeps asking for permission

Turn ClipShot on under System Settings › Privacy & Security › Screen & System Audio Recording, then quit and reopen it. After installing a new version, macOS may treat it as a new app: remove the old ClipShot from that list with – and allow the new one.

On a Mac, my video's notes show mouse clicks but not the keys I press

macOS keeps the keys you press from an app until you allow it. Choose Allow keys… on the recording bar, or turn ClipShot on under System Settings › Privacy & Security › Input Monitoring, then quit and reopen it. Keys you press while that was off weren't noted, so they can't be added to a video you already recorded.

Can a team share one copy on Linux?

Yes. Put the folder on a network share, at the same path on every workstation, and run bash install-linux.sh --shared there once. Everyone then starts its run.sh, which adds ClipShot to their menu. Each person's settings and captures stay in their own home folder.

Where are my screenshots and videos?

In Pictures\ClipShot (on Linux ~/Pictures/ClipShot), unless you chose another folder in Settings. The folder button in the editor's top bar opens it. Screenshots are PNG files, recordings MP4 files.

I started ClipShot and no window opened

That's normal: it starts minimised to the tray, among the small icons next to the clock. Double-click the icon, or start ClipShot again, to open the editor. To see the editor at every start, turn off Start minimised to the tray in Settings.

I closed the editor. Is ClipShot still running?

Yes. It waits in the tray, among the small icons next to the clock (you may have to click the ^ arrow to see it). Click the icon to capture, double-click or middle-click it to open the editor, and right-click it for a menu with every action, Settings and Quit ClipShot.

Can I still change a screenshot after saving it?

Yes. Open it from the strip at the bottom of the editor and every arrow, text and shape is still a separate object. ClipShot keeps these layers in its own private folder and recognises the picture by its content, so renaming or moving the file doesn't matter. If another program changes the picture, it opens as a plain image.

Is a pixelated area really hidden when I share the file?

Yes. The PNG file contains only the finished picture, so nothing under a pixelated or covered area can be recovered from it. The editable layers stay on your computer.

Do I need admin rights?

No. On Windows, ClipShot runs from its folder and saves its settings for your user only; the Python it needs can be installed for your user too. On Linux, install-linux.sh never uses sudo. ffmpeg, if it's downloaded, goes into ClipShot's own folder.

Why does ClipShot want to download ffmpeg?

ffmpeg is the free tool that records and converts videos. Screenshots don't need it. The first time you record or export a video, ClipShot offers to download it from the official builds linked on ffmpeg.org, checks that the download is intact, and keeps it in its own folder. Settings shows whether it's ready and has a Download ffmpeg… button.

My recording has no sound

Tick Microphone on the recording bar before clicking Record. If you have more than one microphone, choose the right one in Settings. ClipShot records your microphone, not the sound your computer plays.

My GIF is huge

GIFs store every frame as a picture. Trim the recording to the part that matters, choose a smaller width (800 px or less) and fewer frames per second (10 or 15). For longer clips, MP4 is much smaller.

Scrolling capture doesn't scroll, or stops too early

Some pages don't react to automatic scrolling, or change while they scroll. Turn off Auto-scroll on the bar and scroll slowly with the mouse wheel, then click Done. On Linux, automatic scrolling needs the small tool xdotool; without it you scroll yourself.

My pen tablet draws without pressure

Open Settings › Pen tablet and check that it says Wintab, and that the line below it found a Wintab driver. ClipShot then reads the pressure (and the eraser end) from the tablet driver directly. Without that driver, pressure comes through Windows Ink, so it needs Windows Ink turned on in the tablet's settings.

On Linux, recording says it needs X11

Wayland, Plasma's default session, doesn't let apps read the screen directly. Screenshots still work there (through Spectacle), but for recording and scrolling capture, log out and choose Plasma (X11) on the login screen. If it isn't offered, the package plasma-workspace-x11 is missing; ask someone with admin rights.

How do I start ClipShot automatically?

Tick Start ClipShot when I sign in in Settings. It then starts quietly in the tray each time you sign in.